Does your dog crave adventure but you don’t always have time to get to the dog park or agility club? A DIY dog obstacle course is the perfect way to engage your pup’s mind and body without leaving home. Building an agility course in your backyard or living room can improve your dog’s confidence, strengthen your bond and provide hours of entertainment. In this guide we’ll cover why obstacle courses are beneficial, how to build a variety of hurdles using everyday items and what safety considerations you need to keep in mind.
Why Build a Dog Obstacle Course?
Agility and obstacle training isn’t just for competitive dogs. Any healthy canine can benefit from navigating a course designed to challenge balance, coordination and focus. Obstacle courses provide both mental and physical stimulation, helping channel your dog’s energy into positive activities. Dogs that regularly exercise their brains and bodies are less likely to develop destructive habits such as chewing, barking or digging out of boredom. Courses also strengthen obedience skills as your dog learns to follow verbal and visual cues.
Beyond the behavior benefits, obstacle courses offer great bonding opportunities. Taking on a new challenge together deepens trust between pet and owner. Plus, watching your dog master new hurdles is immensely rewarding. If you have multiple dogs, an at-home course gives them a safe space to play together. You can even invite friends over for a doggy play date and let everyone try the course.
General Safety Tips
- Use collapsible or flexible materials so your dog won’t get hurt if they misjudge a jump.
- Avoid sharp edges; sand down any wood or pipe pieces.
- Consult your vet before starting agility with puppies or dogs with joint issues.
- Place obstacles on non-slip surfaces and choose a safe, open area such as a fenced yard.
- Always supervise training, watch for signs of stress or fatigue and keep water nearby.
- Encourage with treats and praise, but never force a scared dog to continue.
Materials and Tools
- PVC pipes or broomsticks for jumps and rails
- Hula hoops or bicycle tires for hoop/tire jumps
- Traffic cones, small buckets or soda bottles for weaving poles
- Children’s play tunnels, large boxes or collapsible fabric tunnels
- Sturdy planks with cinder blocks for ramps and catwalks
- Pool noodles or foam for soft bars
- Treats or favorite toys for motivation
Many of these items can be repurposed from around your home, making the course both fun and budget-friendly.
Jumping Obstacles
Jumping builds coordination and confidence. Create simple jumps using PVC pipes, broomsticks or hula hoops supported by low bases. Start with the bar just a few inches off the ground so your dog gains confidence. The bar should rest loosely so it falls if bumped. For a hoop jump, hang a hula hoop at chest height from a tree branch or doorway with rope or bungee cords. Begin by luring your dog through the hoop at walking speed before progressing to a jump.
Weaving Poles
Weave poles challenge focus and body control. Set up 10–12 cones or upright items in a straight line, spaced 18 inches apart for small dogs or 24 inches for larger breeds. Guide your dog on leash through the weave pattern, rewarding as they follow the path. As skills improve, add more poles or reduce spacing. For a festive twist, substitute candy cane poles or decorated sticks during holidays.
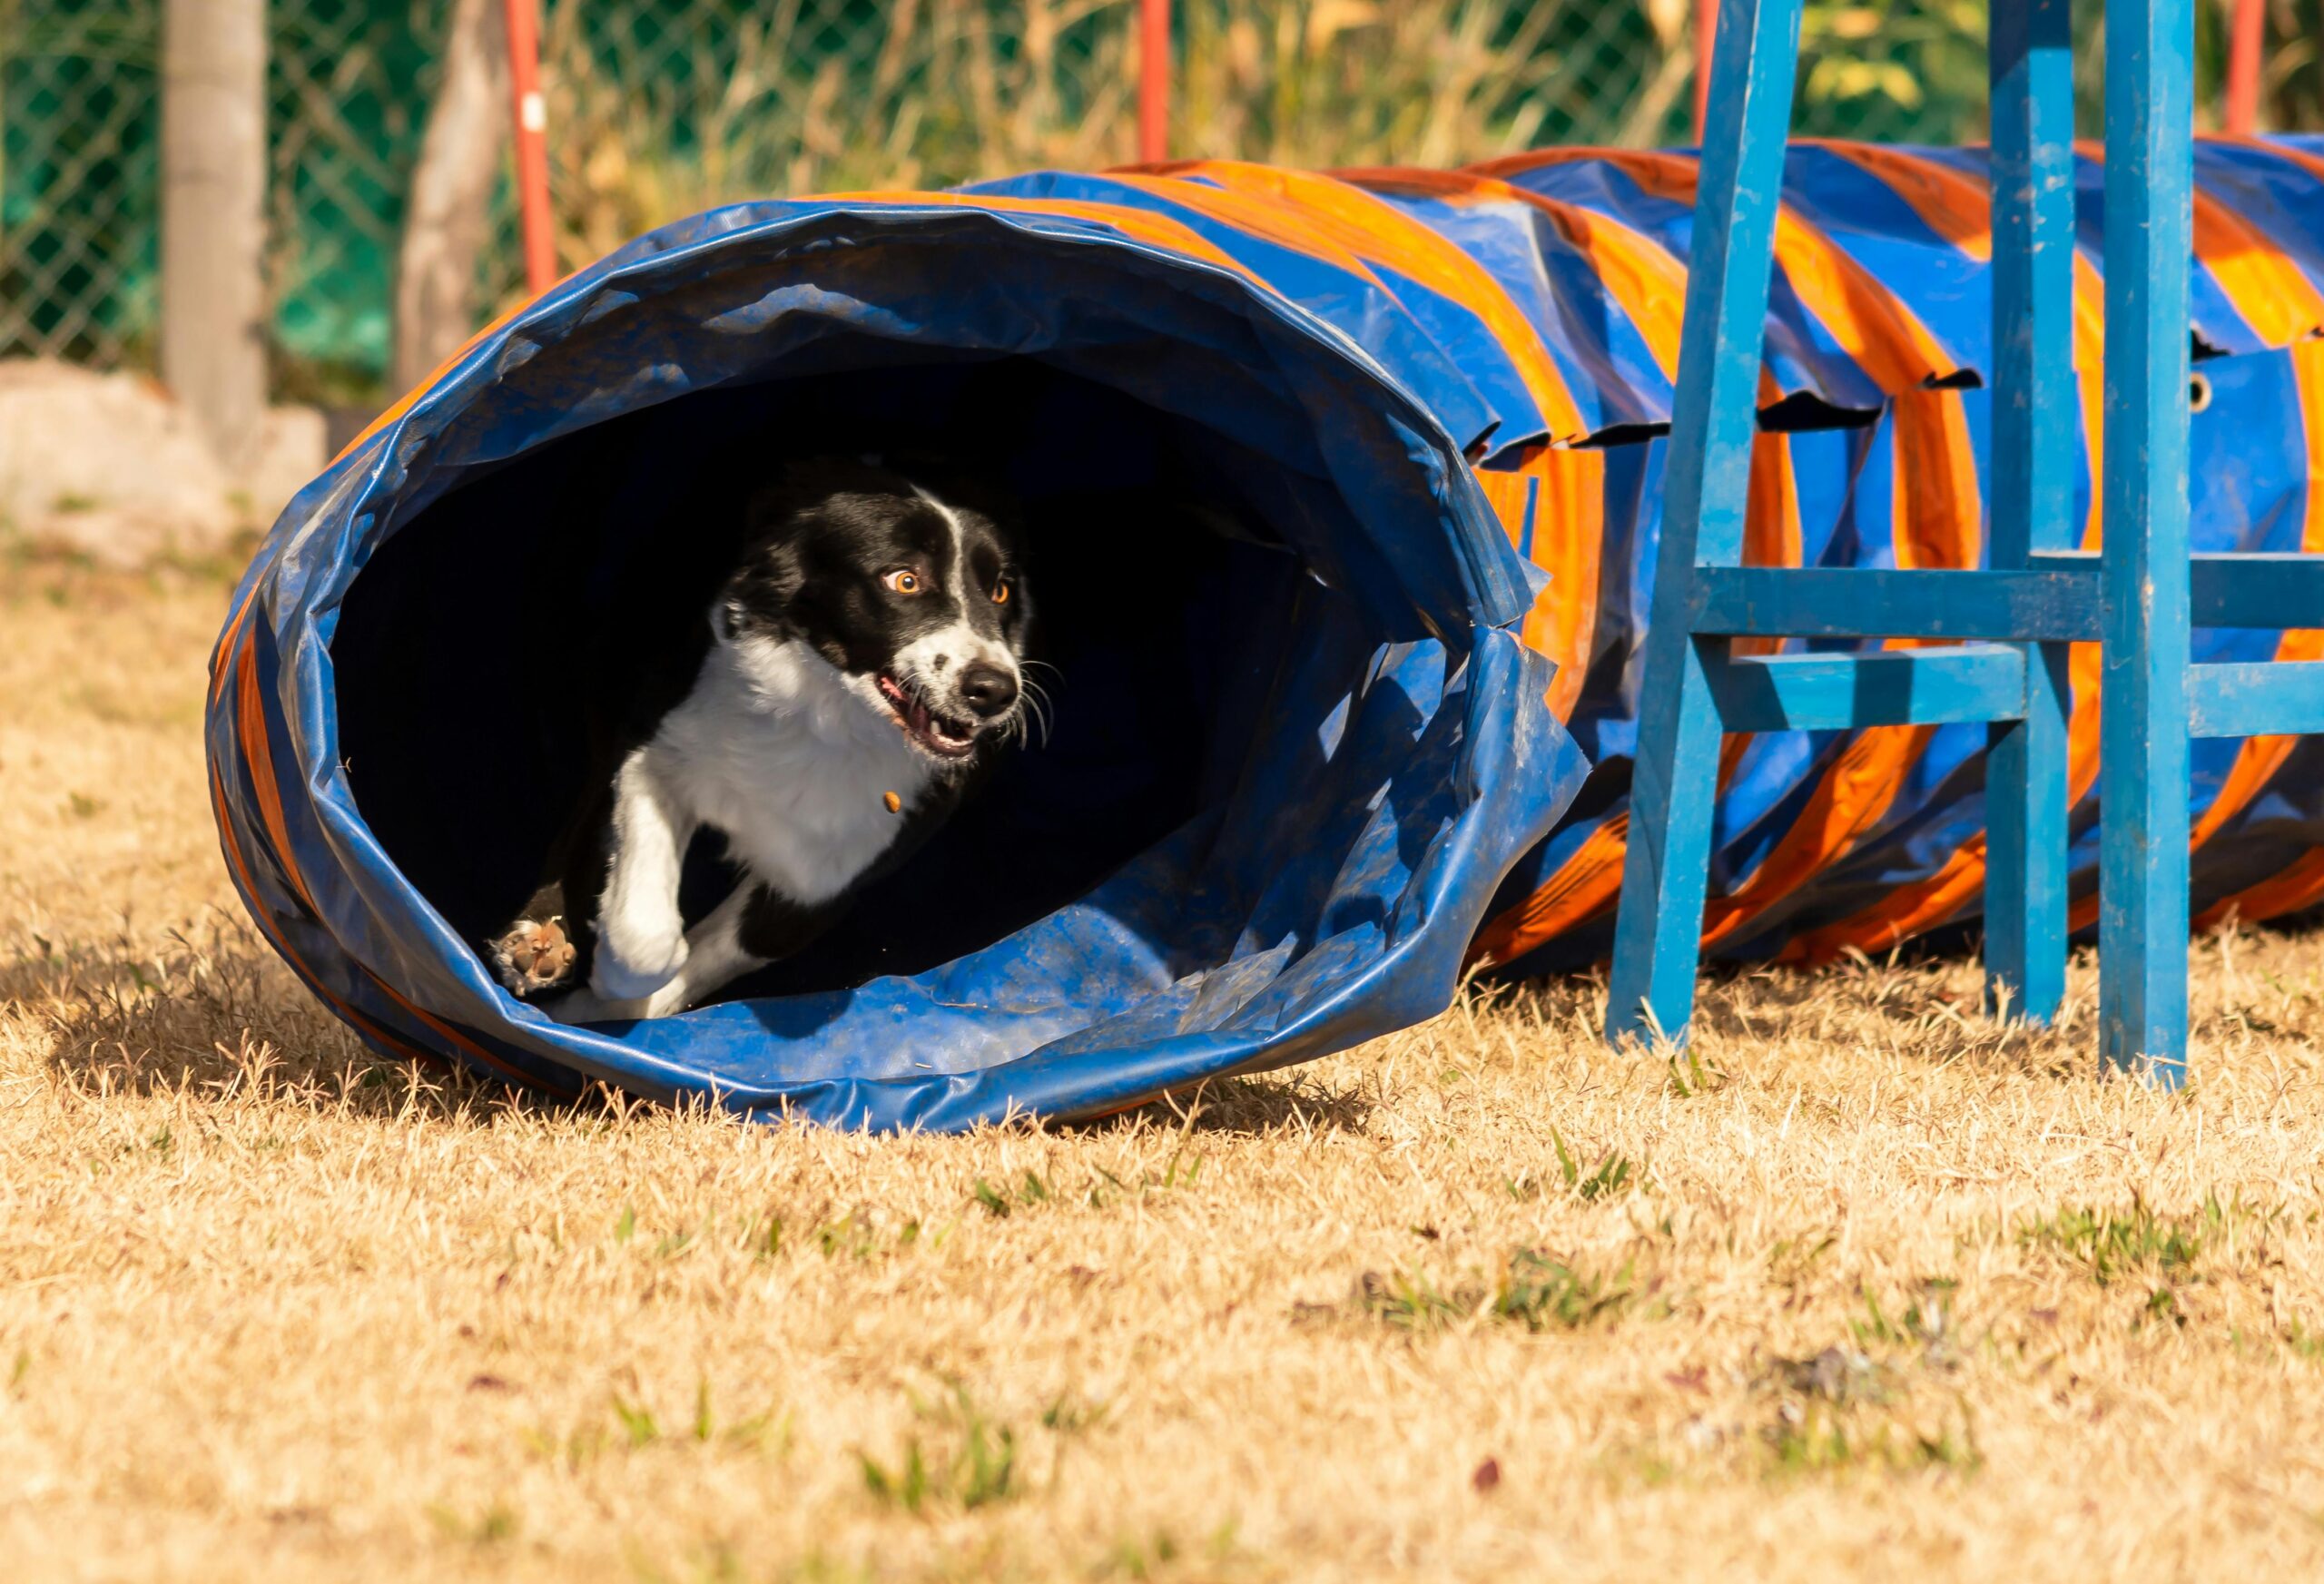
Tunnels
Tunnels encourage curiosity and confidence. Use collapsible children’s play tunnels or connect large boxes to form a passage. Start short and straight so your dog can see the exit, rewarding them at the other end. As they grow comfortable, lengthen and curve the tunnel. If hesitant, shorten it or lift the sides for more light until they gain confidence.
Ramps and Catwalks
Balancing on elevated surfaces builds strength and teaches careful movement. Create ramps by placing a sturdy board on cinder blocks or bricks. Ensure the board is wide, stable and secure. Add carpet or rubber matting for traction. You can also create stairs using stacked boxes of increasing height. Reward slow, steady steps and discourage rushing.
Leave-It and Pause Exercises
Not every obstacle has to be physical. Incorporate training stations for impulse control:
- Leave-It Station: Place tempting items on a path and teach your dog to ignore them using a cue like “leave it.” Reward compliance generously.
- Pause Plates: Use a large mat or board to teach your dog to stop, sit or lie down briefly before continuing. This mimics the “pause table” in competitive agility.
Tire Jumps and Other Variations
Suspended tires or rings add variety. Hang a tire or sturdy ring from a branch or beam at chest height, ensuring it is securely fixed so it cannot swing. Guide your dog through slowly, progressing to small jumps. You can also weave pool noodles between poles for flexible hurdles or add creative elements like wobble boards, kiddie pools with balls, or sprinklers in hot weather for extra fun.
Training Tips and Progression
- Keep sessions short (5–10 minutes) and end on success.
- Use positive reinforcement—clickers, treats or toys—for correct performance.
- Break down difficult obstacles into smaller steps if needed.
- Gradually increase difficulty by raising jump heights, tightening weave spacing or linking obstacles.
- Monitor your dog’s body language for signs of fatigue or frustration.
Conclusion
A DIY obstacle course is a creative, affordable way to enrich your dog’s life. With a few common household items and imagination, you can build jumps, tunnels, weave poles and ramps that challenge your pup mentally and physically. Prioritize safety, start slow and reward generously. Soon, you’ll have a confident canine athlete who looks forward to every session. Whether you’re an experienced trainer or a first-time dog owner, a homemade course provides exercise, bonding and endless fun.